|
TCC - Portsmouth VA |
|
June 16, 2007 |
|
Rubber Mold Workshop with Ed Francis |
|
This was a workshop aimed at teaching the basics of making rubber molds using different types of mold materials. The location was the classroom at TCC in Portsmouth. The class was presented by Ed Francis at TCC. Ed had a good selection of glass items made using molds and discussed the challenges of each. |
| In most cases the reason for making a mold is to allow exact duplicates of a design to be produced. In glass making this may be hot casting or pate de verre style. Molds may be permanent (i.e. reusable) or one-time (destroyed after the casting process). The latter is the likely reason for needing a rubber mold. |
|
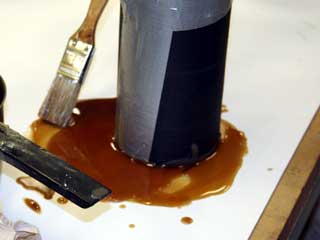
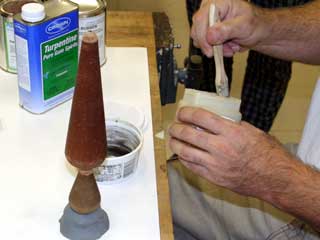
Sealing the form containing the original and rubber casting material is critical -- unless you want the rubber to run out the form. Here the bottom is being sealed using hot wax. |
| A reverse (negative) of the original item to be copied may be created in rubber. This allows a nearly infinite number of wax copies to be produced from this negative mold. The resulting positive wax copy can then be turned into a negative plaster mold. The plaster can then be filled with powdered glass and fired. The plaster will be destroyed when the glass is removed. Additional plaster molds can be made by making additional wax positives. |
|
A urethane mold ready to be filled with wax. Molds may consist of 1 or more "parts". |
| The simplified mold-making process might consist of building a suitable form around the original, anchoring the original, mixing and pouring the mold material, allowing it to cure, removing the form, and then removing the original inside from the flexible rubber material. The negative mold can then be filled with suitable microcrystalline wax to produce a near identical copy of the original. |
|
Ed Francis shows cast glass made in a metal mold. |
|
Much of the class was directed towards looking at the options and determining how a mold can be made for specific projects. Each person who attended was asked to bring several items that they might want to mold. From the assortment, several were chosen and used as examples by going through the process on those items. |
|
Some of the items brought for the class are shown here. |
|
There are three main types of materials: latex, urethane RTV, and silicone RTV. Each has it's pros and cons, so the first step is to chose a material for your mold. Silicone RTVs are probably the best all-around material but are also the most expensive of the group. |
|
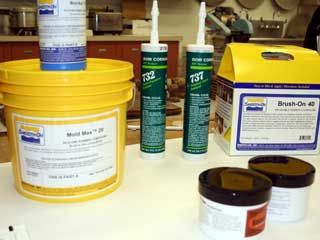
Materials include silicone and urethane RTVs. Products from Dow, Smooth-On, and Townsend Atelier are shown here. |
|
There are wet and dry mold materials, dry generally requiring a mold release on the object being molded. RTVs are available in different durometer ratings (Shore A scale). Lower numbers on this scale are softer, higher numbers produce firmer molds. |
|
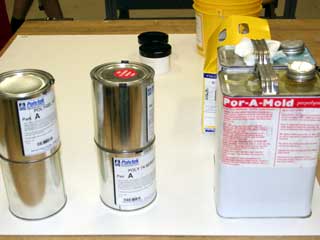
Containers of rubber mold materials. These include Por-A-Mold (Synair) and Polytek materials. |
|
Urethane always requires a mold release to keep the object from sticking. Pam cooking spray is one option, Vaseline thinned with mineral spirits (shown here) is another. |
|
Mold materials can be thin or thick. Thick types (thixotropic) can be brushed or spread onto a surface and will stay put, whereas thin types will seek their own level and are intended for poured molds. A third type is a putty than can be used for taking impressions and making molds. |
|
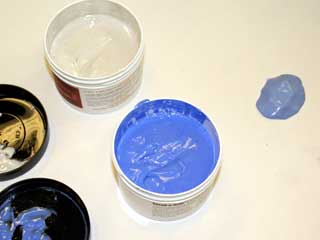
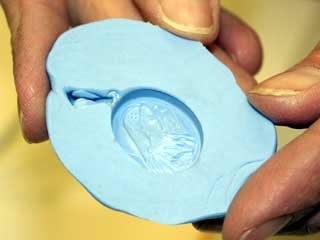
Silicone putty (Knead-A-Mold). A uniform blue when properly mixed. |
|
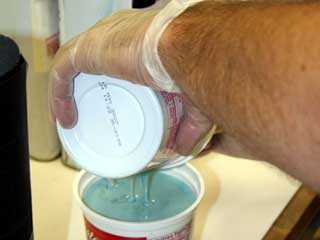
Proper mixing of the material is important. Get the ratio wrong or mix it incompletely and the material may not cure, generally making a mess. |
|
Pouring the mixed material (Por-A-Mold) into another container to continue mixing. |
|
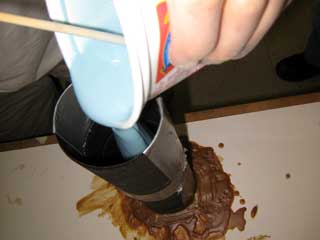
You'll need a form to contain the item and the mold material. Here it was tarpaper and wax. The mold material is being poured. |
|
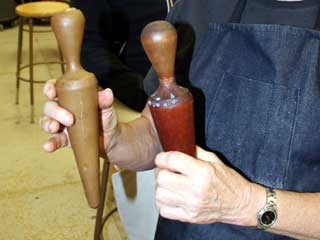
Positive molds & negative molds, mother molds & daughter molds. It's all part of the process. |
|
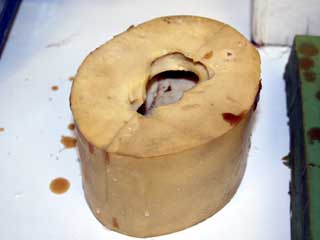
Here the original (right) and its wax duplicate made from the mold are sown together. |
|
Results of a mold made from silicone RTV putty. |